Back To


Please Be Patient
The thumbnails may take some time to load.
Click on any picture to see a
larger version


Here's another old Martin in
remarkably good shape with the exception of the frets.
The frets have been removed and the board has been prepared in the same fashion as
we saw above.

Once again the prep work on the board amounts to
90 percent of a perfect re-fret.
|

This guitar has a particularly nice piece of
rosewood on it. Lots of color and very dense. |

I usually fret with a hammer almost exclusively.
I feel it gives me the most control & consistency. |

The frets are installed with a fair amount of
overhang to help keep the fret ends from springing up as I hammer in the rest of the
frets. |

Occasionally I will reach for "Jaws",
a Dan Earlwine invention. It's a portable fret press - a great tool from the king of
fretting. |

All the frets are in - this job will need only a
minimal of leveling before crowning. |

By the way - the neck is resting on two bags of
25lb buck shot to support the hammer blows - It acts as a great anvil. |

I always tape up a board during the crowning
stage - yes it's a pain and it takes longer ... |

... but I'd rather spend time pulling tape off
the board than worry about file marks in the wood. |
|
|
|


Here's an electric neck being crowned. The body
is safely put away in the case. (I wish we could do this with acoustics - dream on) |

A crowning is followed up by hand polishing the
frets to leave them feeling as smooth as - well - polished frets - what else. |

The finished product. A dream to play on.
You'd be surprised what a difference well shaped frets can make in your playing. |

|
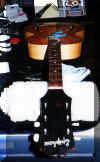
Here's an Epiphone archtop from the 30's, I
believe. The frets were so loose I didn't even need the fret pullers for mast of the
fret removal. |
|
|

With the board prepped as we saw above. Half the
frets go in- this one gave me a bit of trouble - the wood was very old and on the weak
side. |
|

All the frets are in and I'm ready to bevel the
ends. |

With a good grip on the neck I'll bevel the
frets to a 30 degree angle, then polish them up. |

All the leveling & crowning is done and it's
ready for strings. |
|
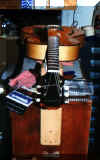
Just have to set it up to get it playing just
right. |
|
|

Gotta love these old guitars. |
|

Here's one you don't see often
- a 1961 Gibson ES335 Dot. This was the last year they made them with dot inlays before
they converted to block inlays. It didn't have a scratch on it - the only problem
was that someone got there hands
on it and filed the frets down to next to nothing. The fret height measured about
seventeen thousandths of an inch high -
unplayable by any standards.
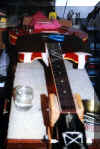
The board was very weak due to poor fret
compression. The frets came out way to easily.
|
Cleaning up any minor chipping and leveling
takes place immediately. |

Before installing frets I chamfer the edges of
the fret slots to aid in seating the frets squarely. |

It's now ready for frets. |

The traditional hammer in method will do very
nicely for this guitar. |

The only thing I had to concern myself with here
was to match the size of the fret tang to the slot to get good fret compression. |
|

Here's one happy guitar owner. |
|
|
|
|


One of the most frustrating
aspects to re-fretting a guitar is pulling the frets only to find that
some one, at some point had re-fretted the same guitar with what is known as the
"epoxy in"
fretting method. Not that it's an invalid way to refret a guitar; however, it
makes the misguided assumption that
the guitar will never need another re-fret. My personal opinion is that using the
epoxy in method is
never necessary and it make life difficult for the poor slob who may have to
re-fret it again in the future.
With that said...


![]()
![]()
![]()
![]()
![]()
![]()
![]()
![]()


